A little prep work before you start painting can make all the difference. Start by washing the walls, patching any holes and sanding glossy areas to help paint adhere.
Next, use a roller to apply the wall color paint. Work in small 4’ sections and slightly overlap each pass.
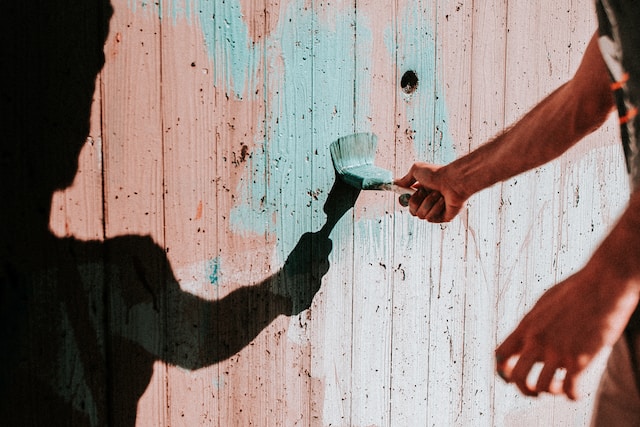
Prep the Surface
The first step to a successful painting job is properly preparing the surface. Whether you’re looking to redo your living room or update your bedroom, the right paint color and scheme can have a huge impact on how a space feels. But before you run out and buy a fresh can of paint or grab some friends or family members to help, consider hiring a professional house painter. They can save you time, stress and money by doing the job faster, more professionally, and with less clean-up to worry about.
In the past, you would have had to sand before painting to prep the surface, but Annie Sloan developed her brand of furniture paint to have incredible sticking power and no need for sanding in the majority of cases. If you’re working on a particularly shiny or smooth piece though, it may be worth a light sand to help the paint adhere.
When painting over raw canvas or wood, you will need to prime the surface before starting. This is done using an acrylic gesso ground, such as this one by Michael Harding which is non-absorbent and will prevent the oil from your paint from staining the surface and creating an effect called ‘sinking in’. It’s also quick and easy to apply, much easier than the traditional method of priming with rabbit skin glue or size. You can find all the gesso you need at your local Annie Sloan Stockist, where shopping with them supports small independent businesses in your area.
Choose the Right Colors
Painting the exterior of your house is a big decision. Choosing the right colors can make or break your curb appeal. You want your home to look inviting and welcoming to potential buyers. Neutral and traditional colors are a good bet when it comes to selling your home. Bold and unique colors may turn off potential buyers.
One of the best colors to choose for your exterior is white. White is a clean, classic color that looks beautiful on nearly any type of house. White is also a great choice because it reflects light well and can brighten up your entire home.
Another neutral option is gray. Gray is a versatile color that can create different looks depending on the shade you choose. Dark grays can create a sophisticated and modern feel while lighter shades can give your home a more airy, serene look. Gray can be a great choice for whole-house paint because it goes with almost anything and will appeal to most people.
If you’re looking for a slightly more bold color, consider reds. The beauty of red is that it can be both modern and traditional at the same time. Some shades of red can be too bright and can cause your home to look overdone, but if you find the right shade, it can be a beautiful addition to your curb appeal.
Greens are also a popular choice for homes. If you go with a green, be sure to keep in mind the surrounding landscape. A lot of green can cause your house to get lost in the scenery, so it’s important to find a color that complements your landscaping.
Browns are also a great choice for homes. If you go with stains or glazes, they can add a rustic charm to your home. If you’re going with an oil-based stain, be sure to use a primer before applying it to your home.
If you’re not sure what color to choose, ask your Realtor(r) for advice. They’ll be able to point you in the direction of comparable homes in your neighborhood and current trends. They can also help you find a color that will complement your siding materials, so that your home looks its best.
Prevent Drips and Runs
Drips and runs ruin the appearance of any paint job and they can be difficult to fix, especially if you have already applied multiple coats of paint. To avoid this problem, you should try to get as close as possible to the trim or baseboards when painting with a brush. It is also helpful to apply a thin coat of primer before you begin painting. This will help the new paint adhere to the surface and prevent drips and other blemishes.
Another way to prevent drips is by using a wide brush or a thick roller when you’re painting. If you use a thin brush, your strokes will be more visible, which can create a conspicuous line. A wide brush will cover more surface area and create a smoother finish.
If you do encounter a paint drip, you can usually fix it by knocking it down while the paint is still wet. You can also blot it down with a damp rag. Once the paint is dry, you can sand it with 220-grit sandpaper. If you sand too hard, you could ruin the surrounding paint or create an even bigger blemish. It is also important to keep a small container of paint on hand for touch-ups. This will allow you to quickly fix any mistakes that you may make.
One of the most common causes of drips is overdoing it. This can happen if you are using spray paint and you aren’t careful about the distance between the can and your target surface. You should also make sure to hold the can of paint at least 18 inches away from the surface. This will prevent you from accidentally saturating an entire area with paint.
Finally, if you’re using a roller and your paint begins to drip, it’s important to roll it out before it dries. This will ensure that you don’t have to sand the dripping area later on. If you don’t have any sandpaper on hand, you can always purchase some at the store.
It’s also a good idea to paint your trim and baseboards last, so that you don’t have to worry about any fallen paint drips. It’s also a good idea to tape the trim before you start painting, as this will prevent it from getting covered in paint as you work.
Finishing Touches
When you’re finished painting, it’s time for the finishing touches. Use a small brush or sponge to touch up any spots where you accidentally went over the lines with your paint or made a mistake. This will make the final result look much better, and it’s definitely worth the extra effort!
It’s also important to take some time to wash the walls before you start painting. This will help to remove any dirt or oil that may get into the new paint and cause it to bubble or peel. You should also use this opportunity to clean your brushes and rollers – don’t forget that they need to be washed properly in order to be at their best.
If you’re painting a landscape, it’s important to follow the rule of the thirds when placing your objects of interest. This will help to keep your eye from getting drawn to any one area of the room, and it will also create a more balanced overall look.
Another tip is to mix a little bit of paint extender into your paint when you’re ready to apply the second coat. This will help your paint last longer and will keep it from chipping or flaking. It’s easy to find at your local hardware store.
A good quality brush is essential when you’re starting out, so invest in some that are built for the job. A palette knife is also a good investment, especially if you’re looking to branch out and try some different techniques.
You should also consider investing in a few disposable paint tray liners. These are a great way to prevent your paint from leaking and can save you a lot of time cleaning up!
And finally, be sure to cover up any floors or furniture that you don’t want to get paint on. Drop cloths are a must, and you can even use plastic sandwich bags secured with tape to protect things like doorknobs. It’s also a good idea to patch any nail holes in the wall with spackle, let dry and then sand smooth before painting. Don’t forget to add a primer as well, as this will help your paint to adhere to the surface and avoid flaking and peeling.